Photography - Another Freerange Moon Shot
Sharing My Results
Hello everyone, welcome back to another shot at astrophotography! I actually got AstroBin to work between now and the previous attempt but realized how the tiers of purchasing are very unlevel. Being able to upload my raw images so people can see their “beauty” is not an option with the free tier because of their limit of 25 MB per image. That is surprisingly little for a service that’s meant for sharing cosmic astrophotography to the world, even for a free plan. Additionally, they don’t support one of the most used ways of saving astrophotography (FITS Images) being uploaded so my time spent perfecting the stretching for PNGs and TIFs took a pretty long time. Lastly, 10 images max, there’s not a lot I can do with that.
So, with all that being said, this is going to be my temporary solution! Adding all my nice images to my website which I think is a really cool idea. Even though they might not gain as much traction, it’s still cool!
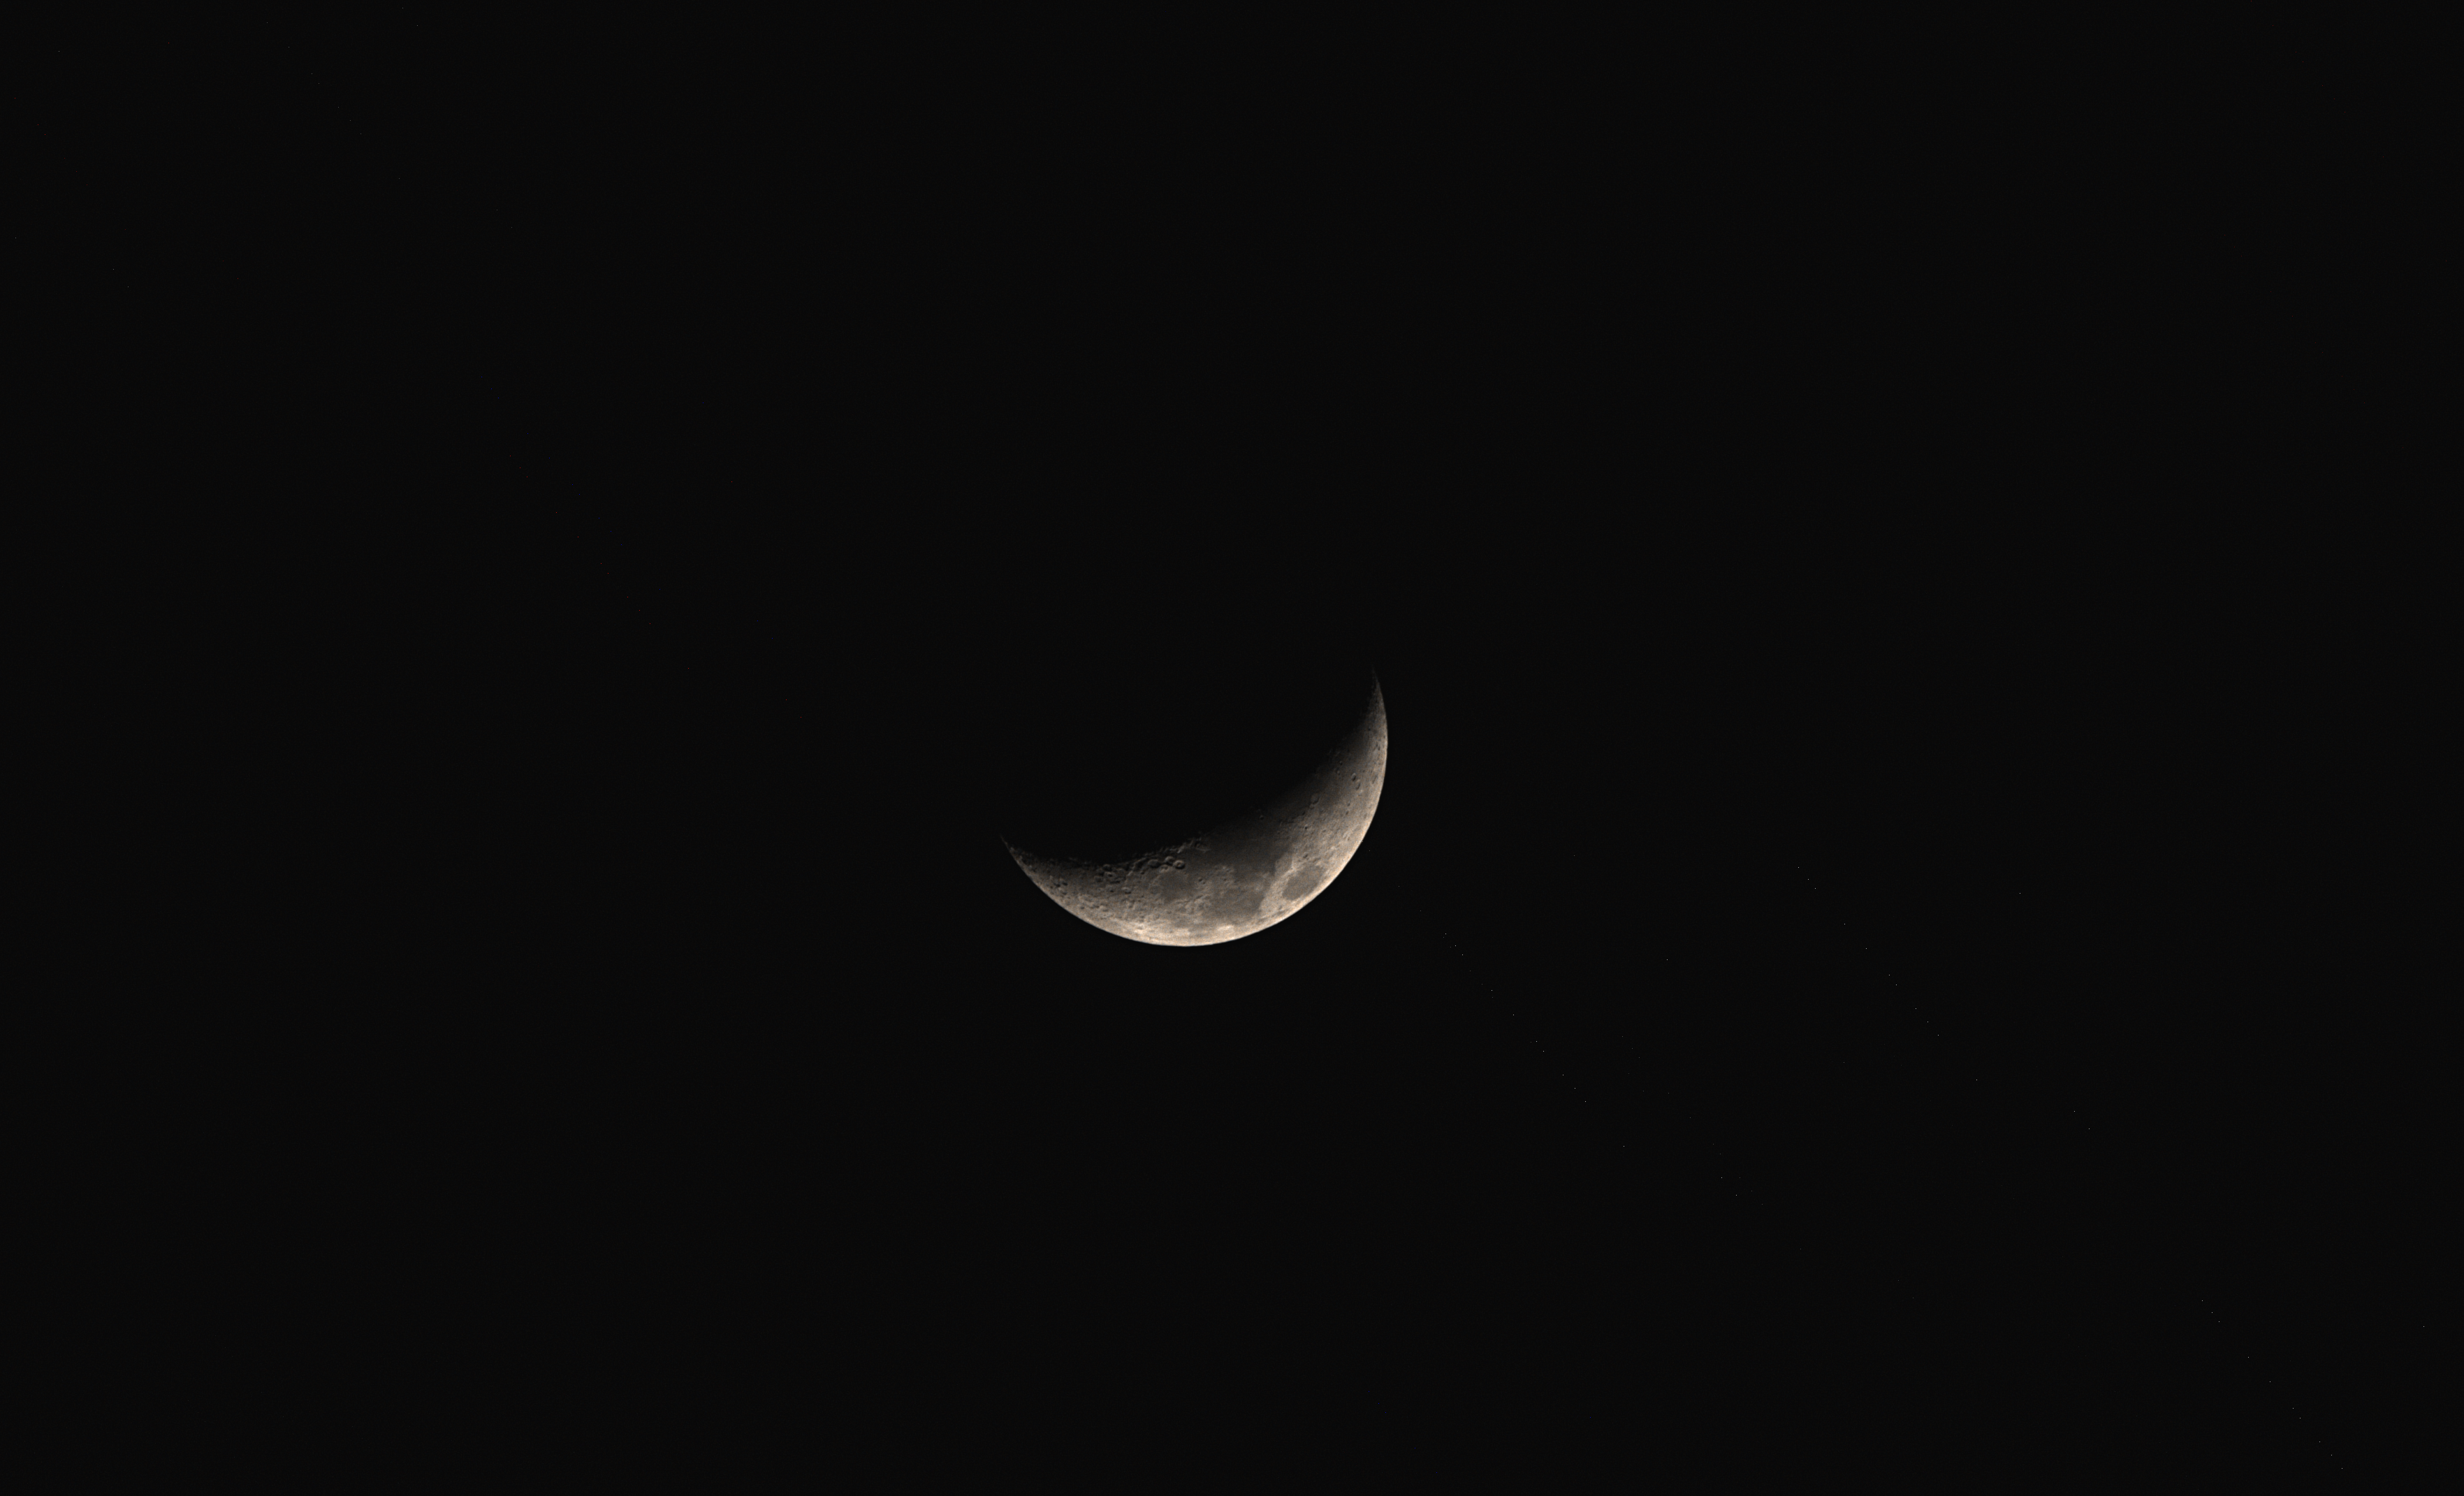
Again, these are the specs: I took the picture in my background with my old DSLR camera on a Maxell tripod stand. My camera is a Canon EOS Rebel T7 with a Canon Zoom Lens EF 75-300mm 1:4-5.6 III lens attached. I connected it to my phone using the Cannon Connect app to take roughly 65 photos of the moon on November 25th, 2025 (Waxing Crescent, approx. 25.1%). I only used 16 out of the 65 using Siril grading.
Siril Config
Another thing I found out that I guess I can “thank” AstroBin for is being able to understand stretches in Siril. FITS don’t automatically have light distributions and to visualize them, you apply your own constrasting shadows and whites, which, can sometimes be bad. When exporting to different image types like TIF and PNG, you need to be able to select the correct stretches for them.
Some of my friends also use Siril to edit astrophotography and wanted to know how to properly export to PNG as well. Here is a quick tutorial to do so!
- Configure Your View - Make sure the FITS visual bars don’t get in the way.
- Configure Your Stretches - Play around with different stretch processes.
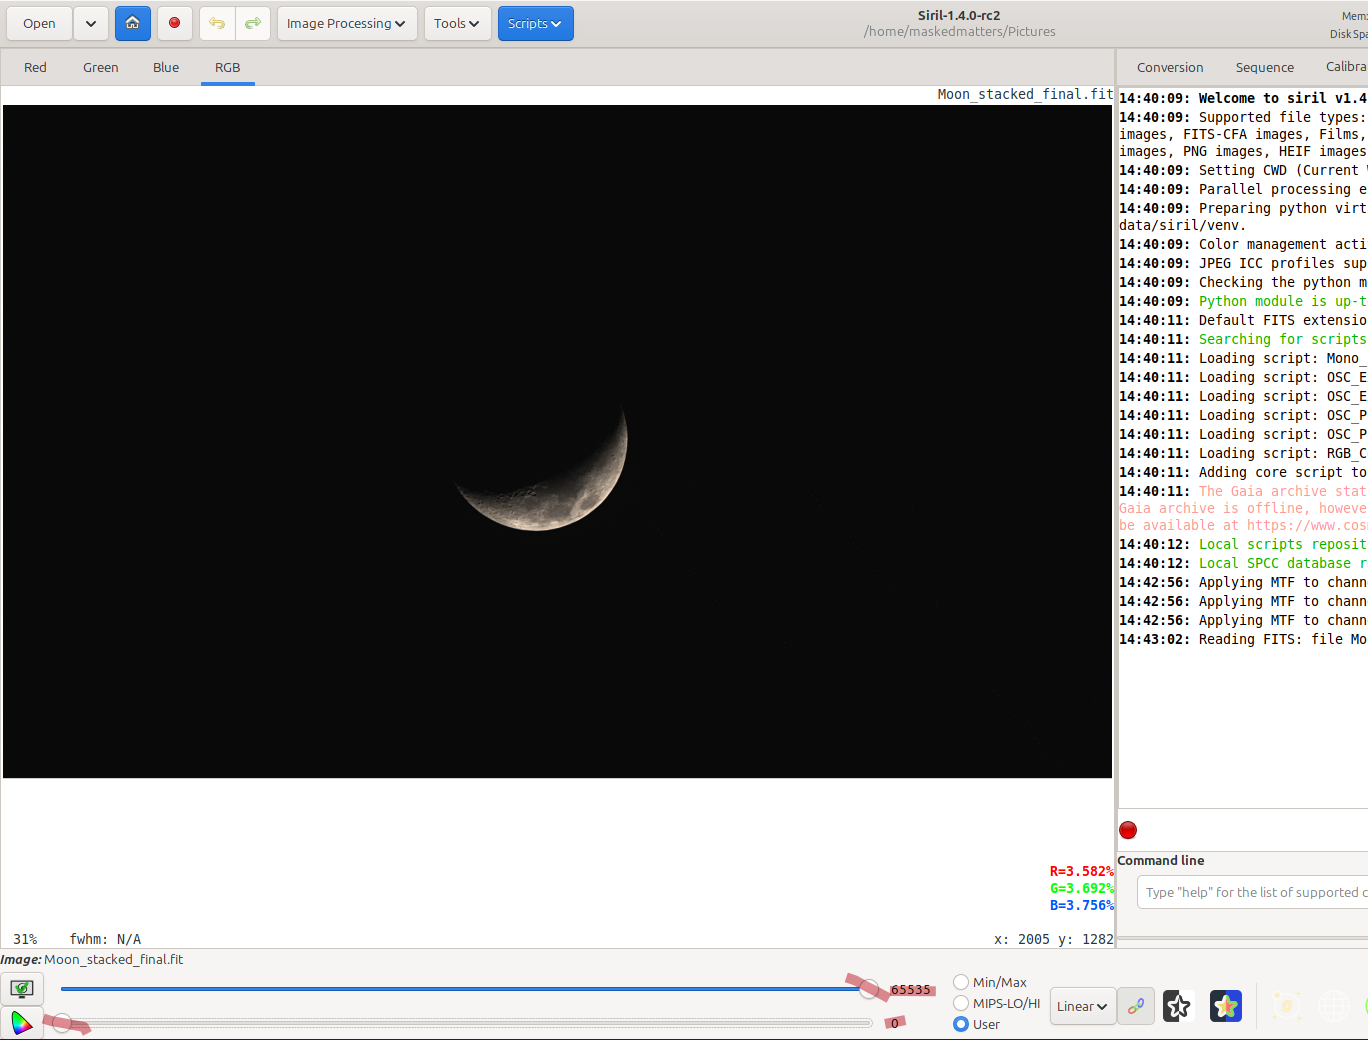
1. Configure Your View
As I said, when dealing with FITS, you apply your own configuration while visualizing them. Since Siril uses FITS and does some of the visualizing by default, the two slides at the bottom of the window might not be set to view the “real” image. Make sure to set the sliders like shown below.
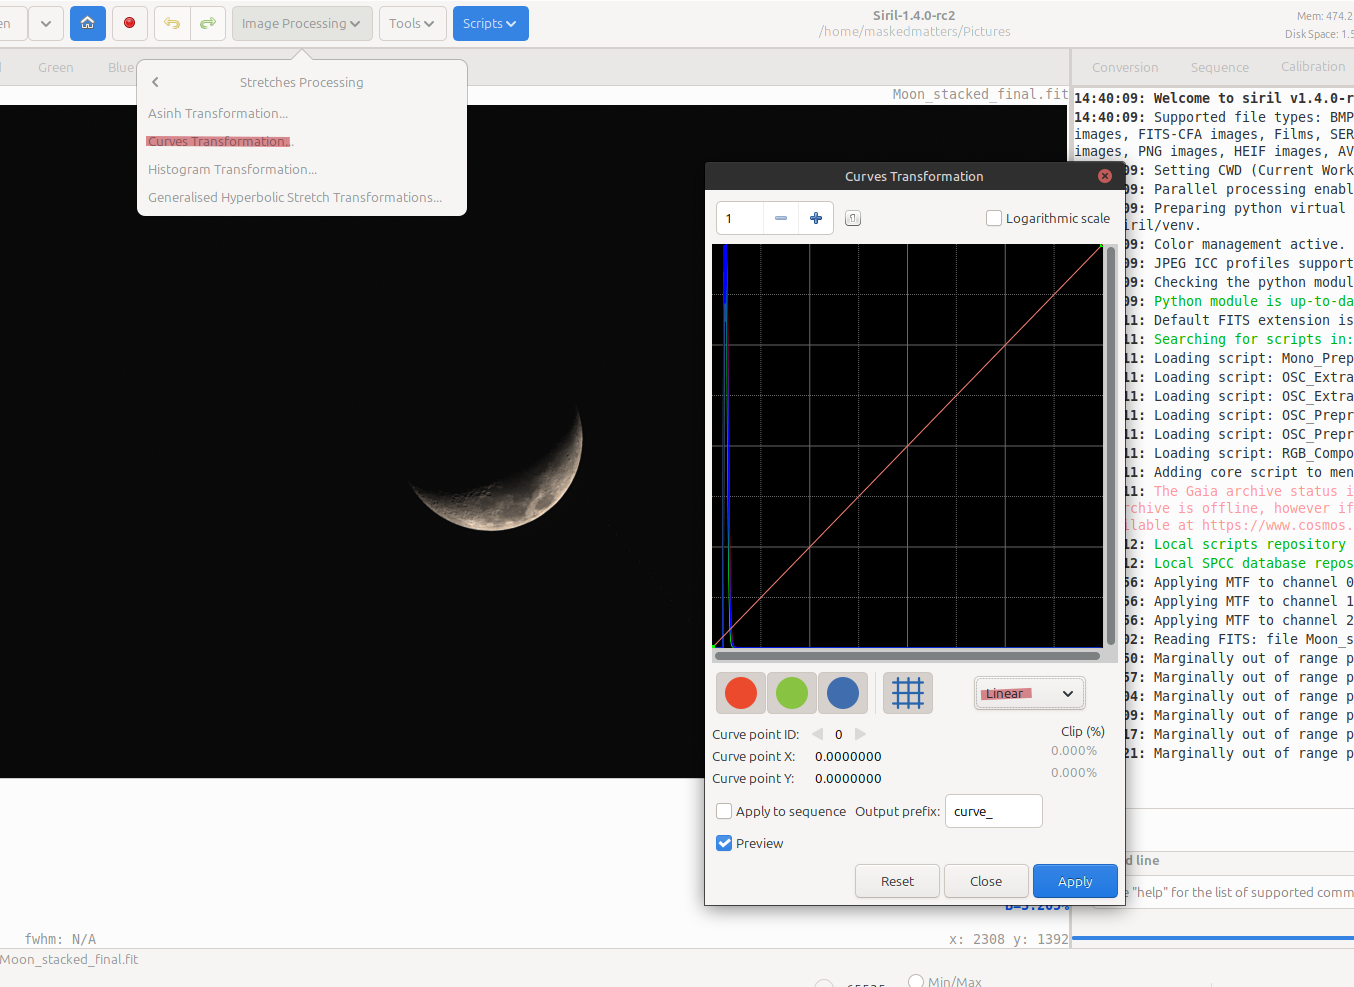
2. Configure Your Stretches
At the top of Image Processing tab, there is Stretches. There are 4 different types of Stretches Processing that all do the same thing in different ways. I’ve had the best luck with Curves Transformation and moving the curve around until I find the sweet spot between the contrasty blacks and exposure of your object.
The key is to play around with the different types of processes and the settings within them. For my specific use case Linear Curves Transformation worked much better between Cubic Spline.
Anyways, thank you everyone for reading my blog once again and happy astrophtograperojgpoyizing (that was weird)!
Byeeeeeeeeeeeeeeeeeeeeeeeeeeeeeeeeeeeeeeeeeeeeeeeeeeeeeeeeeeeeeeeeeeeeeeeeeeeeeeeeeeeeeeeeeeeeee!